Thursday, May 17, 2012

Amazing Kitchen Update

Oh man...am I excited about this one!

The kitchen transformation continues. Piece by piece. Step by step. The latest? The backsplash! SFX: trumpet fanfare.

Let me back up a little. Here it is before we started working on it.


And here it is after the cabinet and countertop updates. In case you missed it the first time around, the cabinet refinishing story is here and here


Today's reveal shows the magic of lovely paint and a backsplash.

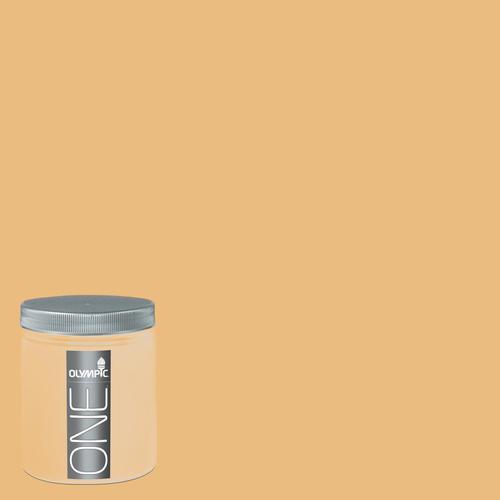
My new kitchen color is Olympic's Gold Buff, which I love for the warm glow it gives to the space.

Zoomed: Olympic 8 oz. Paint Sample - Gold Buff
Source
For the backsplash I chose decorative thermoplastic panels by Fasade.  My panel design is Tradition 1 in Bermuda Bronze. For the most part I followed the directions they provided and it went up relatively smoothly. I choose to attach the panels with double-stick tape rather than glue, just in case I don't keep this up forever-and-ever-amen we won't have to replace the drywall underneath.

Here's a look at the process.

This is what we've been looking at for the past five months. Drywall backsplash. Bleh.


I used newspaper as a template for each 18" x 24" panel. This worked well since, as I've said before, the house is wonky. Even though the upper cabinets are level and the countertop is level, the space between is not the same distance. Weird, I know. So, folding to mark the bottom edge....


...as well as marking the outlets worked extremely well.


Attaching the template to the panel allowed me to cut each piece to fit. I started out using the craft knife, but turned out scissors worked better. The craft knife was good for starting the outlet openings.


In a couple places, the upper cabinets were hung unevenly. My paper template worked wonders to get a custom fit.


Okay - almost there! After eleven custom-fitted panels and an additional trip to the supply store, I was ready to caulk. The instructions didn't say to do this, but there was a slight gap between the countertop and the panels leaving a light colored strip visible.


Using colored caulk, I filled the gap. Besides, the extra seal sure won't hurt.


Next step, outlet covers. A matching sheet of sticky paper allowed me to cover the covers!


Lovely, don't you think? I even found some bronze screws in Brian's stash to replace the old white ones. For a minute there I thought I was going to have to break out the fingernail polish. :-)


Are you ready? Tada!


Hello there, Gorgeous!


I can't even tell you how happy this makes me! It was absolutely worth the effort!

We went from this....


...to this...


...to this.


The Graduation Open House countdown continues and I am reevaluating my to-do list.
Looks like painting the downstairs bathroom will have to wait.
The debate goes like this: we can have yummy snacks at the party or a freshly painted bathroom.
Hmmmm - yummy snacks. Painted bathroom.
Nevermind - I'll just clean the bathroom and put up the new shower curtain.

Yea! Yummy snacks win! 

Thanks so much for stopping by A House and Yard today.
I hope you enjoyed my kitchen update.

Tuesday, May 15, 2012

Pre-Party Pandemonium

There is nothing like the knowledge you will receive a multitude of guests into your home in a matter of days to provide incentive to kick it into high gear. What's the occasion, you ask? Daughters #3 and 4 are graduating from high school and we're having an open house on Sunday!

Aren't they cute?


Their senior pics were taken by 
this talented young lady at 


Sydney and Shelby started kindergarten together at the ages of 5 and 4 in our little homeschool.
Have thirteen years really gone by already?!?

Okay - onward to the project list....


The backsplash will be installed. I am SO excited about this one! Here's a little hint of my new wall color.


Don't you just love my messy before pictures? Makes the finished product so much more beautiful.
At the other end of the kitchen is this little corner in need of organizing.


The downstairs bath will get a quickie update with a new shower curtain and paint job.

The entry needs paint. I've taped off the area where the living room color ends and the entry color will start. It's been interesting dealing with the absence of trim to define the boundaries.


The entry color will go on up the stairs and down the hallway, as well as into the area directly to the right of the front door.

Brian's been working on the sunroom.  He's got some of the windows in already!


I'll be dishing up some yummy snacks for the party, so will keep you posted about the menu and the finished updates. Guess I better get out of my chair and get moving again!

Monday, May 7, 2012

Sunroom Project

There is progress on the 
sunroom addition to the house!

To refresh your memory, here is the deck before it was made bigger
and the original railing and cover removed.

This is what it looks like now with ceiling panels installed.

Following are some shots of the progress....
After making the deck bigger to accommodate the size of room we wanted,
the demolition began.

Goodbye, old deck cover.

See you later, old framework.

Here you can see both the sunroom framing and
the exterior wall extension that is needed for our room.

Frames are up...

...and vented ceiling panels installed.

While installing the ceiling panels, Brian discovered this little froggy.
I hope you appreciate these pictures, because I had to get up on his shaky old ladder 
to get them and I do not like ladders of any sort - shaky, sturdy, old or new!

He appeared to to be quite comfy up there, but
was gone the next day when Brian needed to continue installing the panels.

Clyde was oblivious to the construction going on around him.
He must have had a long night of mouse hunting.

May continues to be busy month at A House and Yard.

There is a double graduation open house to plan
as well as a family outing to celebrate my mom's birthday.
Not to mention the never ending list of projects 
that slowly, but surely are being checked off the list.

Keep your eyes open for updates.
Have a blessed day!