Showing posts with label Furniture. Show all posts

Tuesday, April 9, 2013

Old Dresser + Chalk Paint = TV Stand

Here is my latest project....


I started with this little gem that was rejected and stored in the shed loft.
One of the top drawers was broken, so I removed them both to make room for electronic gadgets.
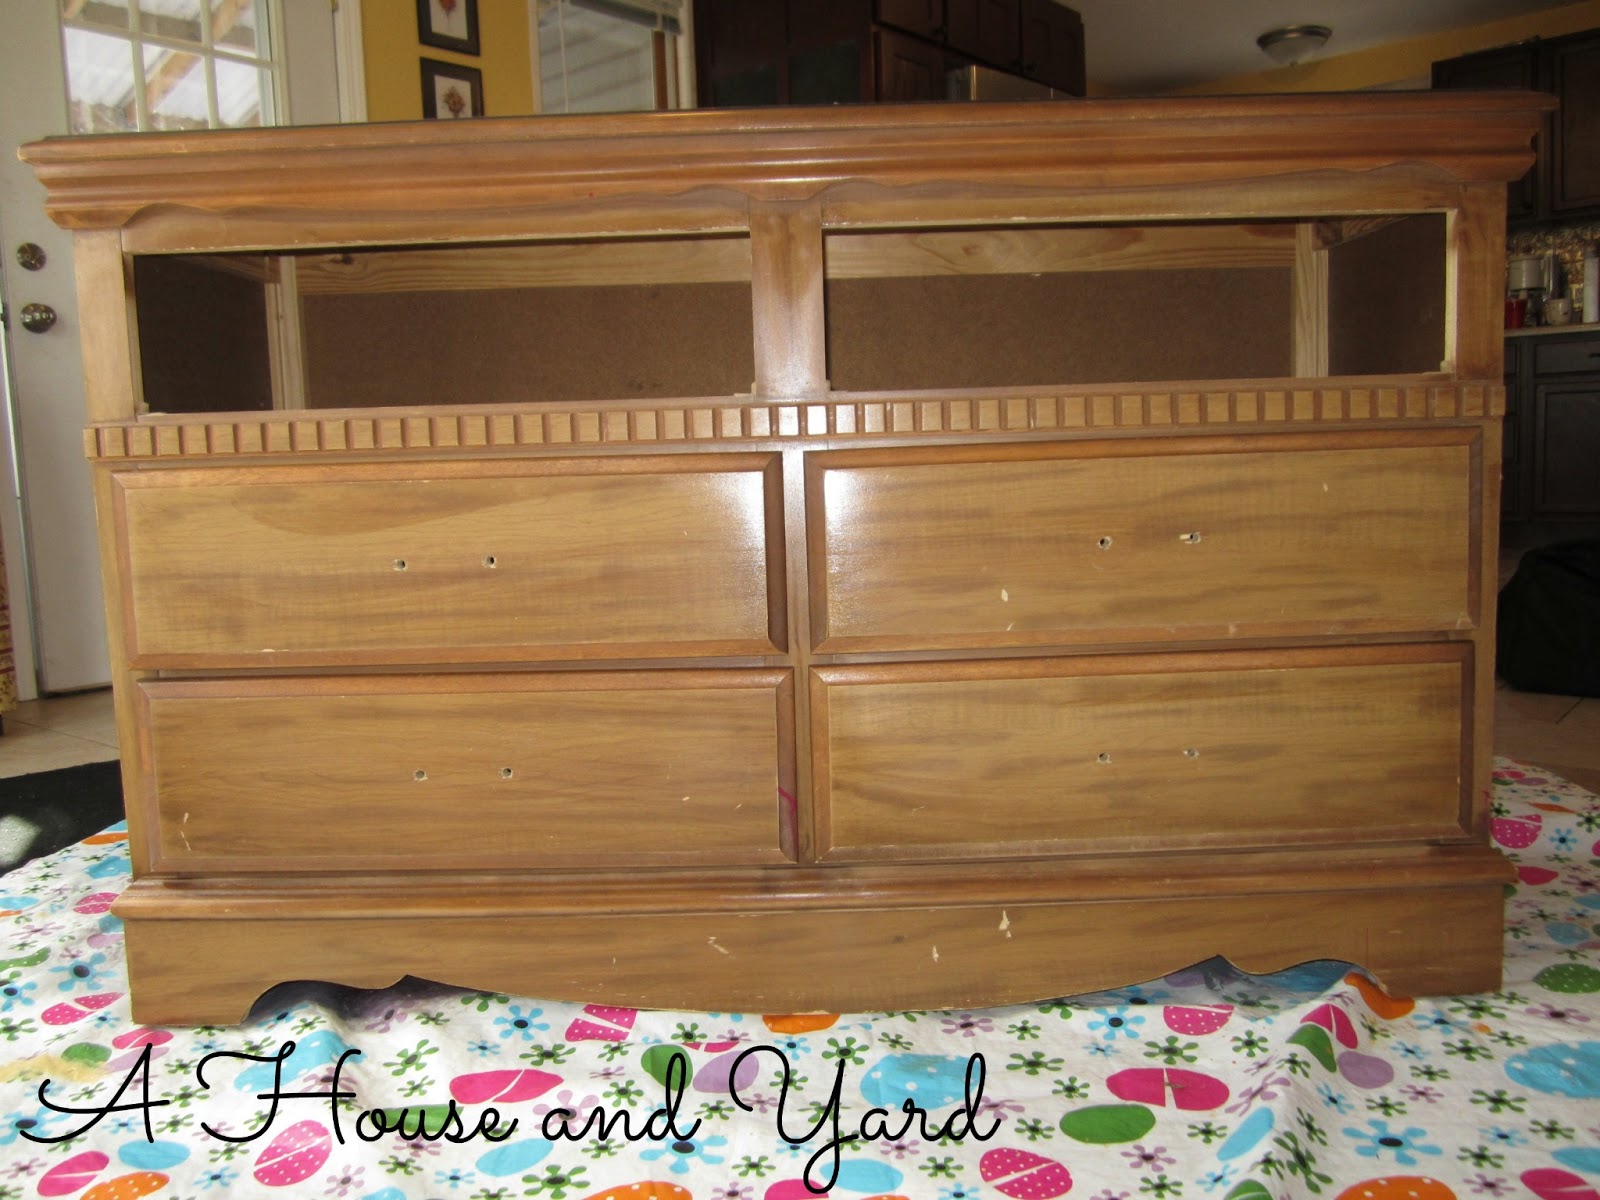

After removing the drawer pulls, I gave it a good cleaning before applying the chalk paint.
The chalk paint recipe I use is this:

3 parts latex paint (I have found a paint with primer works best)
1 part plaster of paris (diluted with an equal amount of hot water)

For example, if I use 1 1/2 cups paint, I would need 1/2 cup plaster of paris that has been diluted with 1/2 cup hot water. Mix these together thoroughly and you're ready to paint! 

For this job I only needed two coats. I like to use a foam roller for the larger flat surfaces and a brush for the corners and curvy places. 

When the paint was dry I protected the surface with SC Johnson Paste Wax. If you can't wait to wax, you may end up rubbing off some of your paint, giving it a light distressed look. By giving it some time to dry the paint should stay in place. I think I waited about 30 minutes after it appeared to be dry before waxing. There was one small edge where the paint rubbed off a tiny bit.

The color is Valspar's Rattan Palm. Because of the chalk paint mixture, it turned out a bit lighter than the actual paint. I covered the inside with a neutral paint sample I found on the oops-paint shelf.

 Brian drilled some holes for wires.


We braced the shelf where the dvd player and Wii will sit with a couple boards from the scrap pile. Brian cut them to fit and we glued them to the sides of the dresser and under the shelf.

Okay - here is what the TV sat on before....
...all chrome and glass contemporary-ness that I never really liked.


Here it is today!


I love how the gadgets rest so neat and tidy inside the cubby.
The drawers are filled with remotes, game controllers, games, manuals, and other assorted junk no one ever wants to look at everyday! The color is about three shades darker than the walls, so blends in nicely.

This project cost me less than $20!


I'm such a geek I just sat on the couch without the TV on to stare it for awhile.
So pretty.

P.S. Did you notice the little boo-boo I made? I thought it was so hilarious I decided to leave it and see if anyone points it out.

Thanks for stopping by today!
Calista @ A House and Yard

Home Stories A2Z  http://salttree.net/  Lil\'Luna    Grace at Home      Mustard Seed Creations Furniture Feature Friday  Shine on Friday      Funky_Junk's_Party_Junk_link_party_150
Calista @ A House and Yard

Tuesday, December 4, 2012

Custom Pantry 3

Alrighty! Last week I showed you the progress on my new pantry and it looked like this....


Remember how I promised to show you my big idea for inside the panels? Magnetic chalkboards!

After doing the research I decided against the magnetic paint offered by a big name paint. The reviews kind of made me nervous; there weren't enough happy reviewers.

Not knowing exactly what I would find, I headed to Lowe's for sheet metal and chalkboard paint. I found a couple knowledgeable staff people and came home with my supplies: 4 squares of sheet metal, double-stick mounting tape, and chalkboard paint.


I had already measured the panels, but did it again just to be sure, fixed myself a mocha, turned on the Christmas music, then got to work.


The metal was easy to cut using tin snips. I had to roll the unwanted piece up and away from the panel in order to cut all the way up.


Probably would have been a good idea to wear gloves.


After cutting all the panels I moved outdoors to smooth the edges. I did this with a small, handheld metal file. I also tapped lightly along the edges with a hammer to flatten those areas that became notched from the snips.


Back inside and time to paint. The paint guy at Lowe's recommend that I prime the metal before using the chalkboard paint, which I did. Then, I applied three coats of chalkboard paint. The paint dried quickly, so this took hardly any time at all. Truthfully, it was fully covered after two coats, but I thought three might last longer if we were going to do a lot of writing and erasing.


When the paint was fully dry, it was time to attach the panels to the pantry. I elected to use double-stick mounting tape rather than glue in case I didn't want the panels on my pantry forever-and-ever-amen. This way I can remove them fairly easily if I decide to do so.

The double-stick mounting tape went on the wood first and after revealing the sticky side, c-a-r-e-f-u-l-l-y I pressed the painted metal panel to the pantry starting at the bottom and working my way up.

One of my panels went on alittle cockeyed for some reason and I had quite a time pulling it off for repositioning. The metal is thin, bending easily and the tape is super sticky, so I ended up with a slight bump. If you try this, make certain of your position before pressing to attach the panel.


On this side, I only used the metal panels in the middle section. I applied the chalkboard paint directly to the primed wood of the lower sections.

I like the contrast of the black paint and the red cabinet.


Still to be done to call this project finished are handles for the large pull-out shelves and some trim. Guess I'll have to write another update!

Custom Pantry 1
Custom Pantry 2

*  *  *  *  *  *  *  *  *

And now for this commercial message.... If you like my pantry and need some cabinets, let me know. My son-in-law, Adam, is in the custom cabinet making business and would be glad to talk to you about your kitchen cabinet, bathroom vanity, and/or furniture needs.

*  *  *  *  *  *  *  *  *

Thank you for stopping by A House and Yard!

Friday, October 26, 2012

Painted Nightstand

31 Days of Order - Day 26

I am happy to show you the little nightstand I painted. Here is what it looked like before.


I picked up an oops quart at Lowe's in a lovely berry knowing at the time I could certainly use it for something! This is the first time I tried painting furniture, so I kept it simple. It seems that practically everyone is using chalk paint, which I had never heard of before I started blogging. Awhile back I wrote down a chalk paint recipe from somebody's blog. My apologies to whoever it belongs to; I honestly can't remember where I found it. The recipe is as follows:

1 part dry plaster of paris + 1 part water and mix together, then stir into 3 parts paint of your choice and mix well. It blended like a dream. My paint was a semi-gloss latex.

I removed the hardware. After cleaning all the surfaces, I lightly sanded the entire piece.

I used a good angle brush for the corners and curvy parts, and a foam roller for the flat areas. The first coat was very light, so I went over it again for full coverage. The paint went on excellently, covered well, and dried quickly. I let it sit over night, then the next day I used Johnson's paste wax for a nice sheen.

Now - I know that practically every chalk paint project I have seen gets a light sanding after all this for a distressed look. Well, please don't stone me, but I don't really like how that looks. So, I didn't distress.

Without further ado, here's my redone piece....


The little knobs I picked up at Pier One on clearance. $0.98 each! Oh yeah!!


So, there you have it! I have moved it into my room and will continue putting together 
the pieces for my own little study nook in my room.

Thanks for visiting today!

* * * * * * * * * * *

This post is part of my 31 Days of Order series. See the rest of the posts here
To find other bloggers also writing for 31 Days this month on a variety of topics, click here.

Linking to....

Saturday Nite Special link party via Funky Junk Interiors


Monday, October 22, 2012

Kitchen Corner Reveal

31 Days of Order - Day 22

I am happy to be able to show you some pictures of the greatly improved corner in my kitchen.

This is what it looked like before....

I already showed you how I covered the back of the hutch with wrapping paper....

This is what it looks like now!
The bins store things like batteries, flashlights, bills, papers, 
computer disks, music CDs, and cooking magazines that need further organization 
(that's a project for another week).
The drawers contain school & art supplies: 
paper, pencils, pens, markers, sticky notes, cards, and so on.


I made the skirt out of cafe curtains. 
Since I'm not using it as a desk, I figured if it was covered I could still use it for storage. 
Ah - ah - ah...no peeking. Actually, it's clean under there, too. 
Our printer is hiding behind the pretty curtain.

I sewed the two panels together, folded and sewed down the top, 
then gathered the seam.
Using stick on Velcro, I attached it to the desk to hide the legs.

This little heart bowl has been my key holder for a long time. 
However, it used to be a dusty blue. Anybody remember that color from the eighties?
The frame got an update as well. Hurray for spray paint!
The autumn print is page from a calendar.

I got to dig out some decorations from the shed loft. It was like seeing old friends.

Stay tuned for an update on my efforts to toilet train the cats!!


* * * * * * * * * * *

This post is part of my 31 Days of Order series. See the rest of the posts here
To find other bloggers also writing for 31 Days this month on a variety of topics, click here.


* * * * * * * * * * *

Linking to....

Primitive and Proper


Lil\'Luna


 Saturday Nite Special link party via Funky Junk Interiors